> For the complete documentation index, see [llms.txt](https://support.incidents.cloud.solarwinds.com/llms.txt). Markdown versions of documentation pages are available by appending `.md` to page URLs; this page is available as [Markdown](https://support.incidents.cloud.solarwinds.com/integrations/alert-source-integrations-native/amazon_opensearch.md).
# Amazon Opensearch
Send alerts to Squadcast from Amazon OpenSearch
[Amazon OpenSearch](https://aws.amazon.com/opensearch-service/) is a distributed, open-source search and analytics suite used for a broad set of use cases like real-time application monitoring, log analytics, and website search.
Route detailed alerts from Amazon OpenSearch to the right users in Squadcast.
{% hint style="warning" %} **Important:**
Amazon OpenSearch can also be integrated through **Amazon Cloudwatch**. Please find the documentation [here](https://support.squadcast.com/docs/amazon-cloudwatch-aws).
{% endhint %}
### Using Amazon OpenSearch as an Alert Source
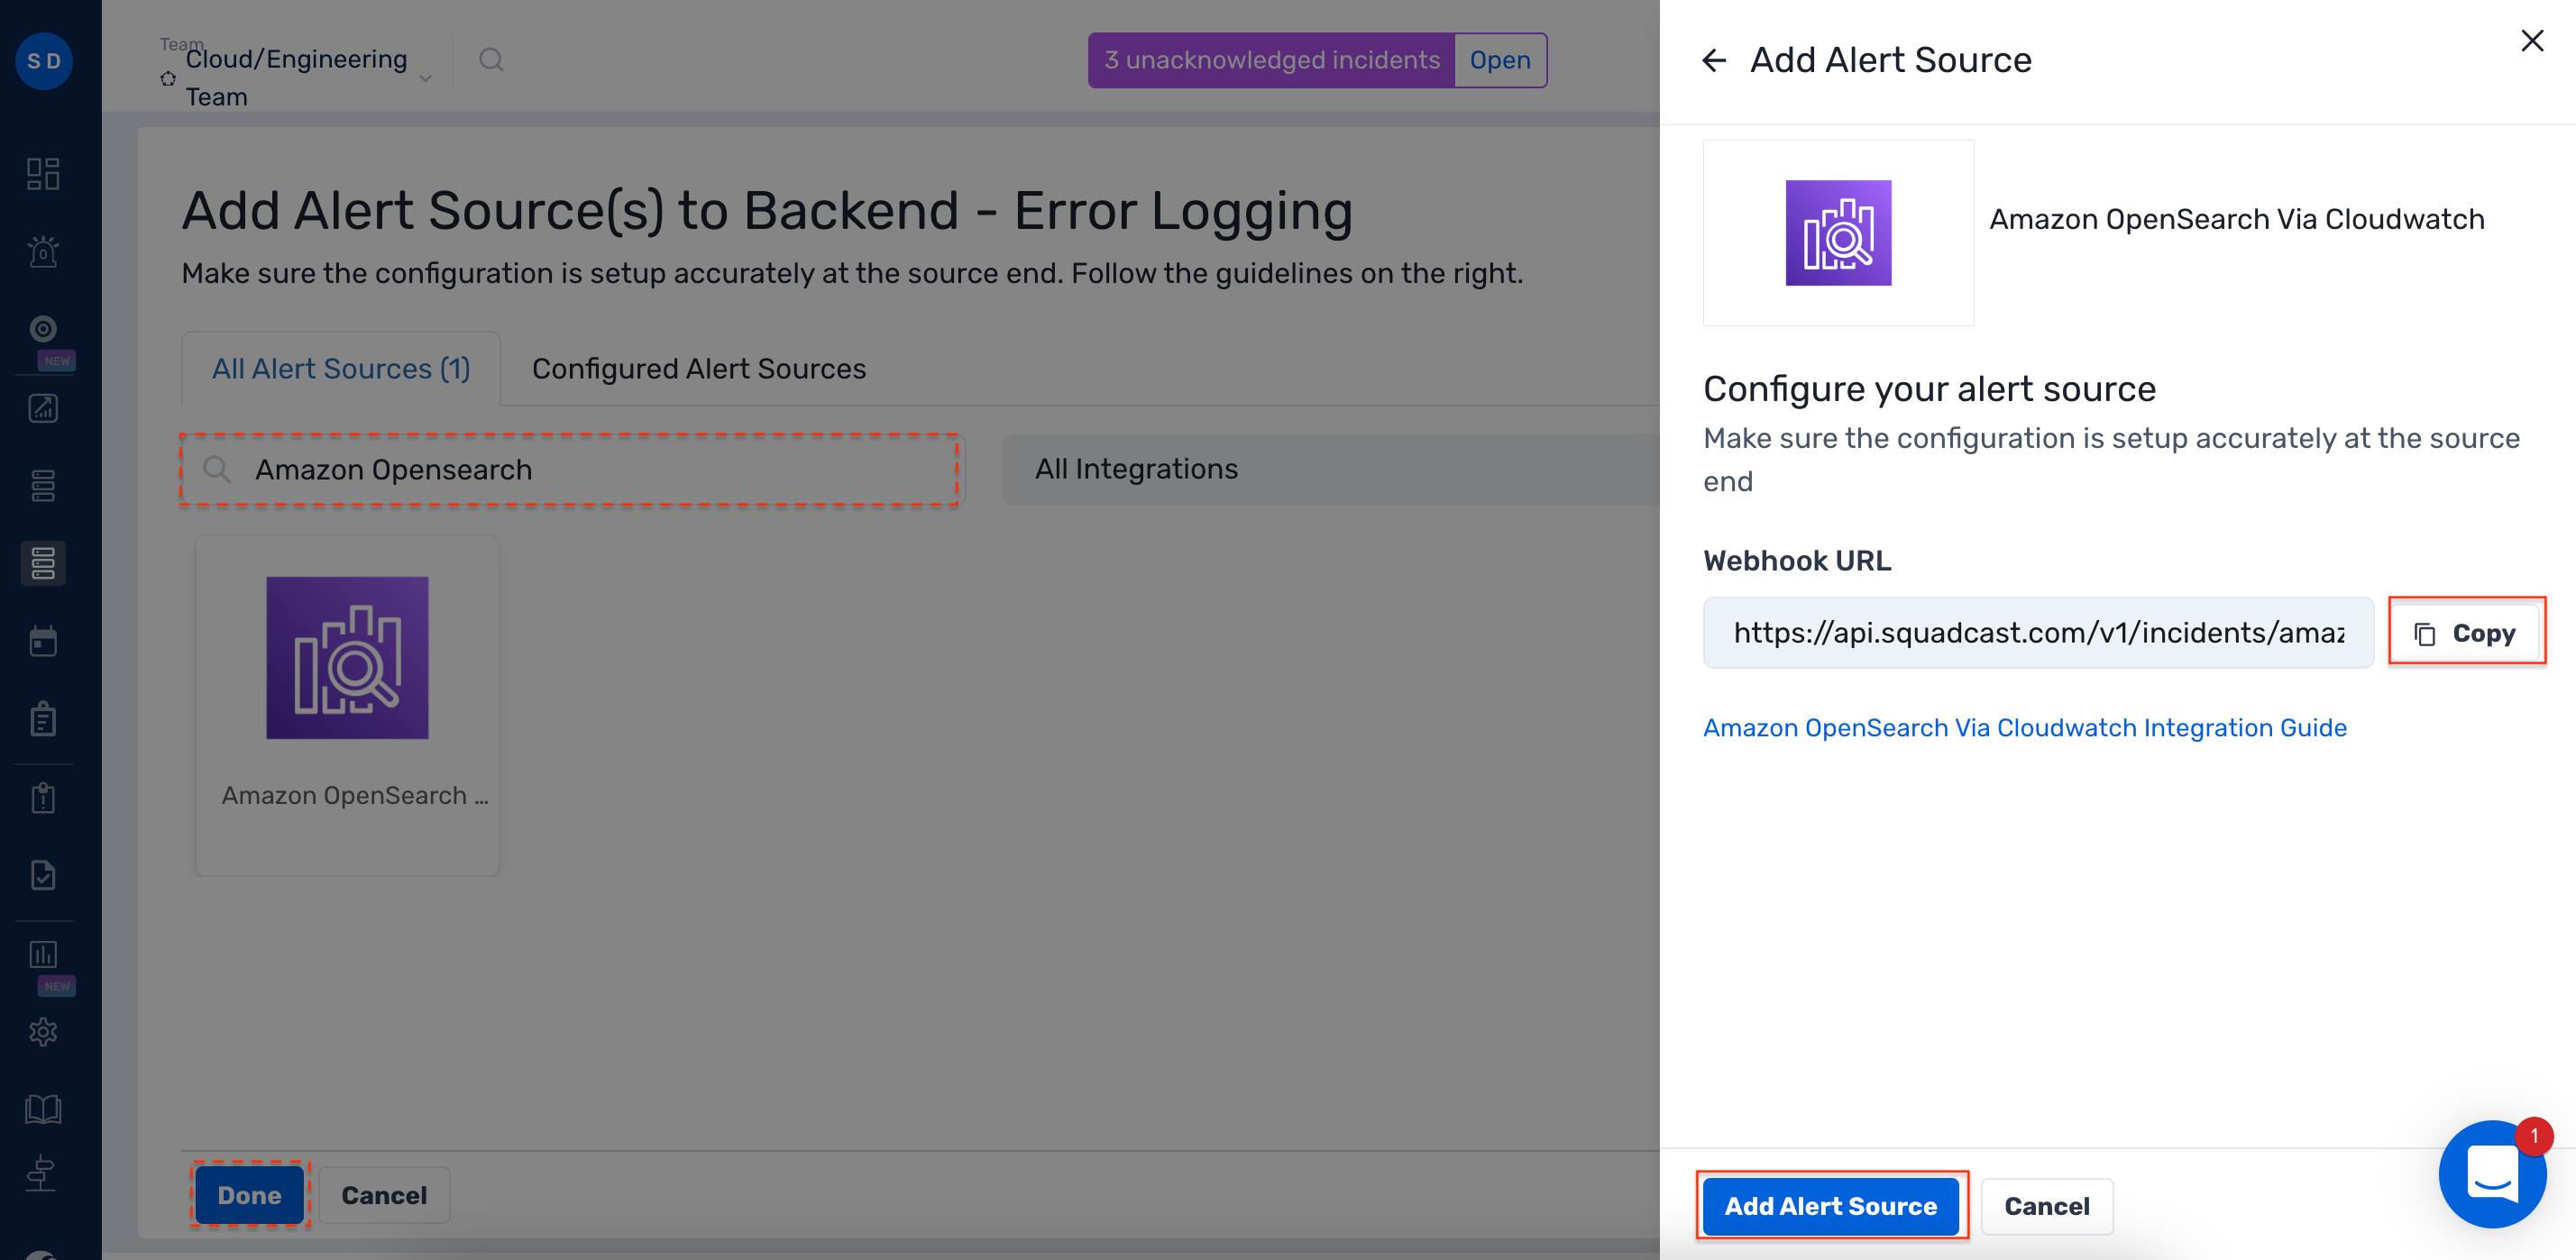
1. Navigate to **Services** -> **Service Overview** -> select or search for your Service. Expand the accordion -> In the Alert Sources section, click **Add**.
2\. Select **Amazon OpenSearch**. Copy the displayed **Webhook URL** to [configure](#create-a-squadcast-webhook-integration-in-amazon-opensearch) it within **Amazon OpenSearch.** Finish by clicking **Add Alert Source** -> **Done**.
{% hint style="warning" %} **Important****:**
When an alert source turns Active, it’ll show up under Configured Alert Sources, you can either generate a test alert from the integration or wait for a real-time alert to be generated by the Alert Source.
An Alert Source is active if there is a recorded incident via that Alert Source for the Service.
{% endhint %}
### Create a Squadcast Webhook Integration in Amazon OpenSearch
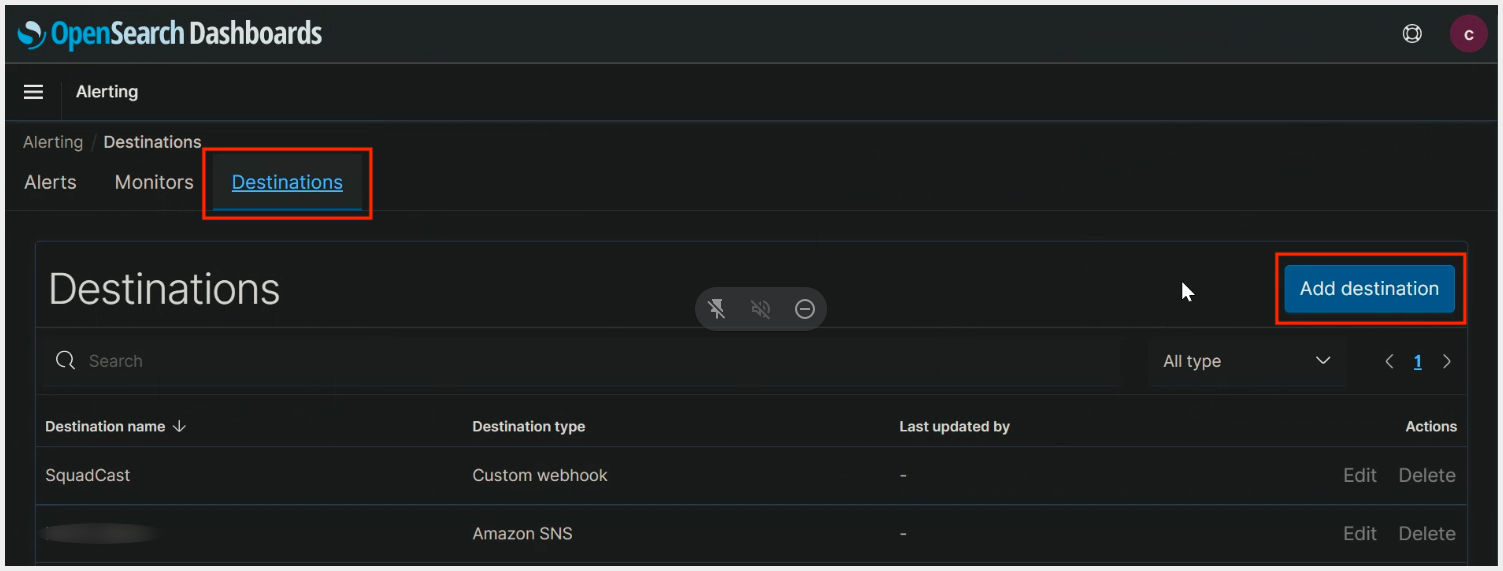
**(1)** Login to your **Amazon OpenSearch** dashboard and select **Alerting**
**(2)** **(a)** Navigate to **Destinations** and click on **Add Destination**.
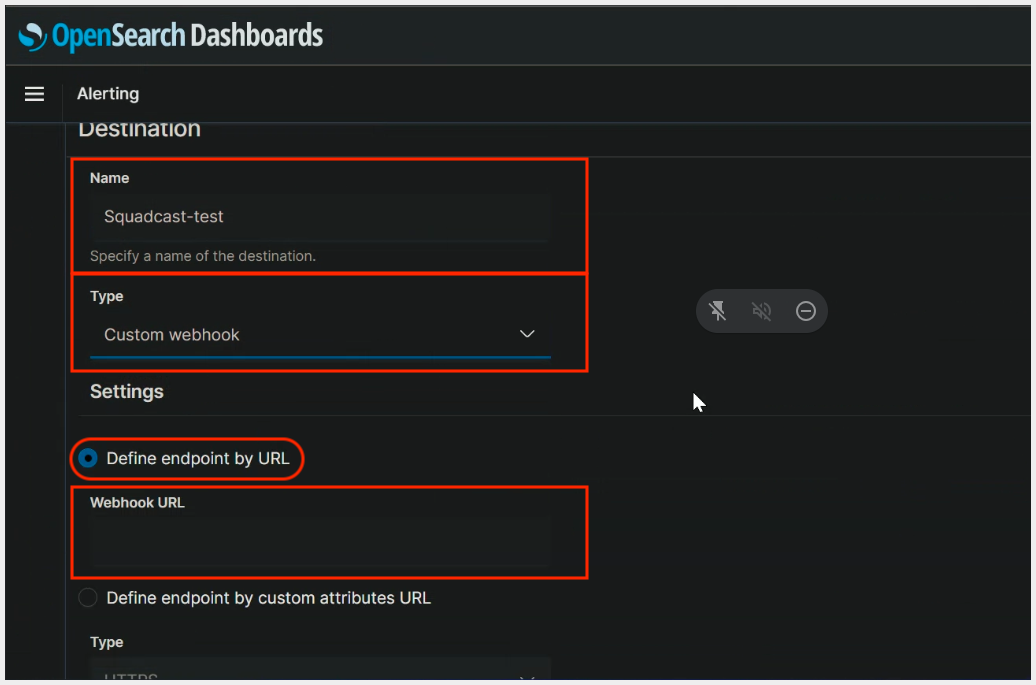
**(b)** Put in the **Name**, select **Custom webhook** as **Type** and under **Settings**, select **Define endpoint by URL**. Then paste the previously copied Squadcast Webhook URL in the placeholder for **Webhook URL** and click on **Save**
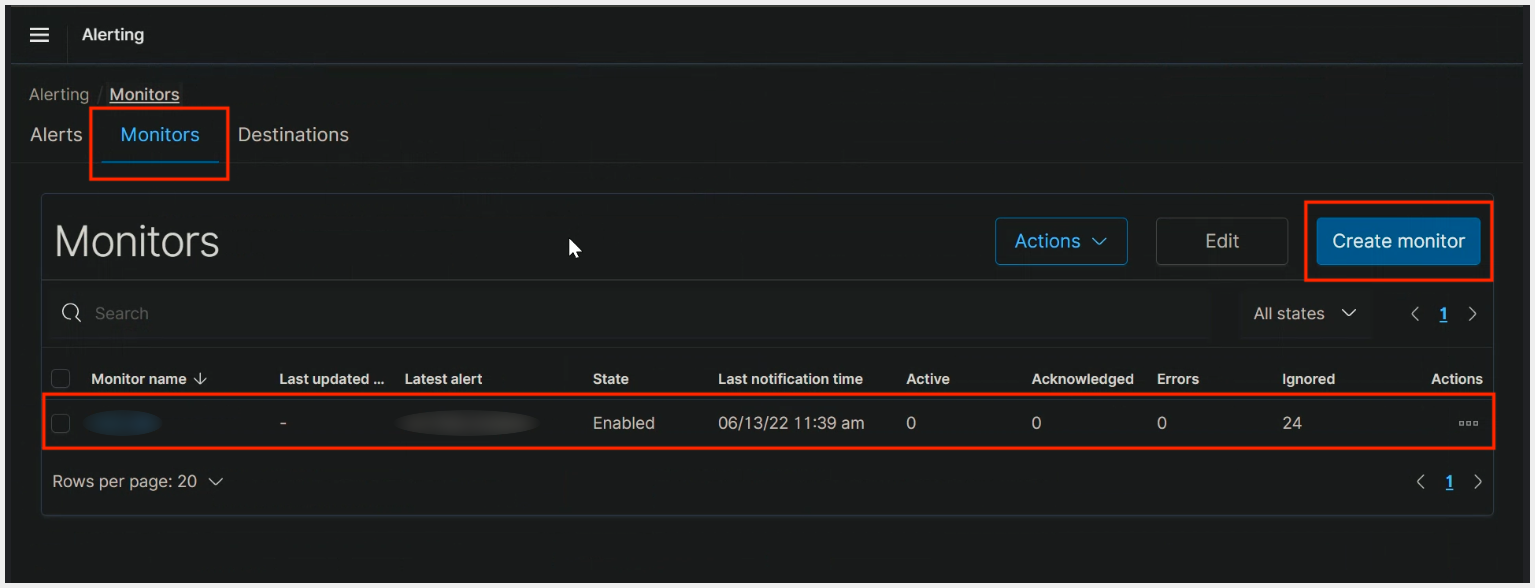
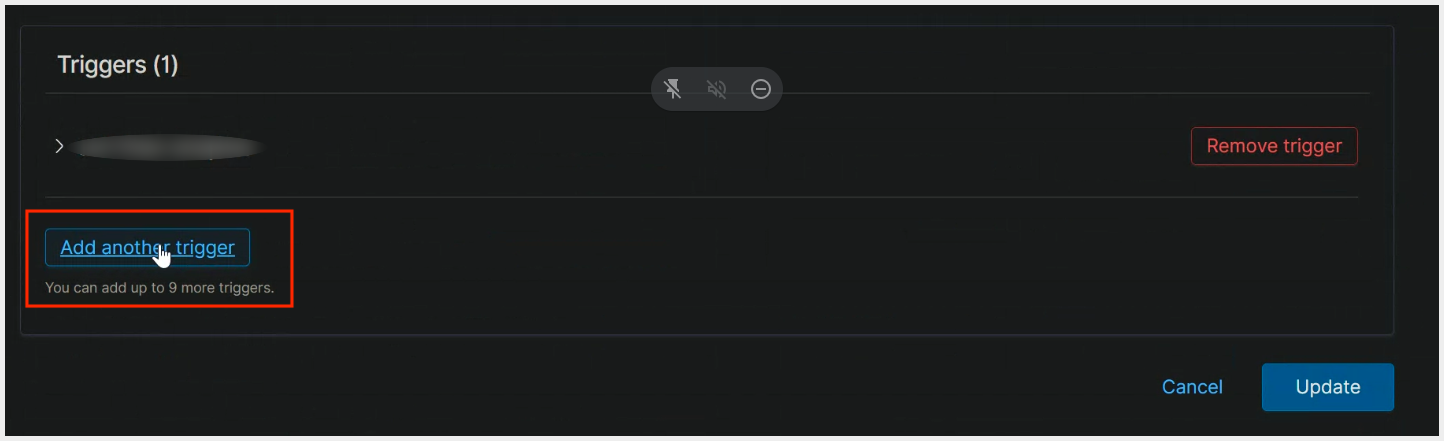
**(3)** **(a)** Under **Alerting**, navigate to **Monitors**. Then either click on **Create Monitor** or edit a pre-existing monitor. Click on **Add Trigger**
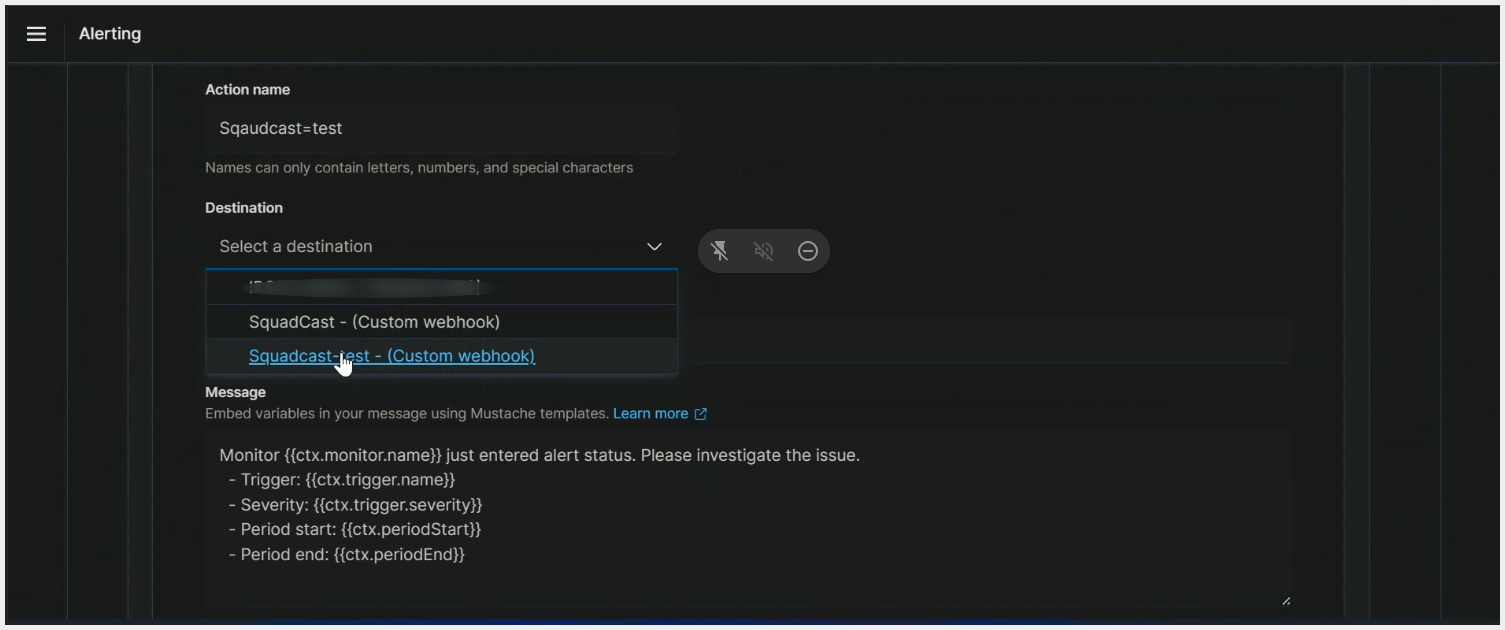
**(b)** Put in the **Action name**, select the previously created **Destination**. Paste the payload mentioned below under the **Message** box and save it
```json
{
"message" : "Monitor {{ctx.monitor.name}} just entered alert status. Please investigate the issue ",
"trigger" : "Trigger: {{ctx.trigger.name}}",
"severity" : "Severity: {{ctx.trigger.severity}}",
"start" : "Period start: {{ctx.periodStart}}",
"end" : "Period end: {{ctx.periodEnd}}"
}
```
{% hint style="info" %} **Note: Custom User Defined Variables**
Users can define custom variables under the **Message** box :
**{ "custom" : { "key" : "value" , . . . , "key" : "value" } }**
Replace the **\[key]** & **\[value]** with proper values and add at the end of the variables mentioned in **Step 3 (b)**. This is how it might look like.
**Eg. :**
```json
{
"message" : "Monitor {{ctx.monitor.name}} just entered alert status. Please investigate the issue ",
"trigger" : "Trigger: {{ctx.trigger.name}}",
"severity" : "Severity: {{ctx.trigger.severity}}",
"start" : "Period start: {{ctx.periodStart}}",
"end" : "Period end: {{ctx.periodEnd}}",
"custom" : {
"trigger" : "Trigger: {{ctx.trigger.name}}",
"severity" : "Severity: {{ctx.trigger.severity}}",
"start" : "Period start: {{ctx.periodStart}}",
"end" : "Period end: {{ctx.periodEnd}}"
}
}
```
{% endhint %}
That's it, you are good to go!
* Your Amazon OpenSearch integration is now complete. Whenever Amazon OpenSearch fires an alert, an incident will be created in Squadcast for it.
*Have any questions?* [*Ask the community*](https://community.squadcast.com/view/home)*.*